
by Stoney Tark
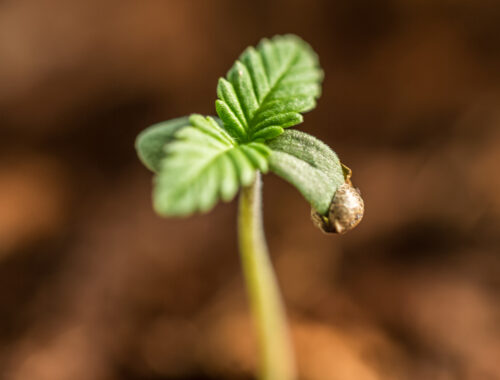
The cannabis seedling stage represents the time when all things are possible, and you begin your journey from seed to harvest. Although it may seem like there is not much going on, the seedling stage lasts for two weeks and is a critical part of the plant’s life cycle. These tips help first-time growers get through the cannabis seedling stage without issues and ensure your seedlings have the best chance in life!
#1: Be Delicate!
Even though your plants will soon become robust and sturdy, during the seedling stage, they need extra care and attention. When handling your seedlings or repotting, be as delicate as possible.
Seedlings are unable to tolerate stress in the same way as a plant in vegetation can. Avoid being heavy-handed and be as light-handed as possible. You would be surprised how easily you can knock pots containing seedlings over!

Photo by Stoney Tark
#2: Foliar Spray
I am a big fan of foliar spraying my seedlings with a cheap spray bottle from the local hardware store. Spraying the plants will not only help increase and maintain the high humidity levels seedlings require, but it will also allow the soil or growing medium to dry out.
Roots search for air and moisture, so the more opportunity they get to spread out into a dry medium, the better. Foliar spraying is also ideal for the seedling stage to prevent overwatering and keep plants cooler during high temperatures.
#3: Use Potting Soil
One of the biggest mistakes that beginner and first-time growers make is using commercially available soil that contains too many nutrients. In some cases, the N-P-K value can reach 20-20-20, indicating that the soil contains chemical additives.
Make your own soil blend or buy a potting soil suitable for the seedlings’ needs. Nutrient burn caused by over-fertilization can stunt a seedling’s growth and create a nutrient imbalance.
#4: Check the pH
You do not need to provide any nutrients during the seedling stage, although water is essential. The pH of your water source should range from 6.0 to 7.0 when growing in soil and from 5.5 to 6.5 when using hydroponics.
The easiest and most accurate way to check the pH of your water source is to use a digital pH pen. These handheld devices are very reliable and accurate, and they save time compared to the old-school dropper-style pH testing kits.

Photo by Stoney Tark
#5: Low Nutrient Levels
There will be a time when you can crank up the amount of nutrients you give your plants, but it is not during the seedling stage, meaning that providing your seedlings with low levels of nutrients is key to their growth.
If you are using soil, you only need to provide pH-adjusted water and allow the available soil nutrients to be used as and when the seedlings need them. Remember, your seedlings are working hard on root development, so they do not have the capacity or requirements to use large amounts of nutrients.
#6: Keep the Light Close
Have you ever grown seedlings that were tall and lanky, and within a week or two were toppling out of the pot with a kink in the stem? This happens when the light is too far away or not intense enough.
The easiest way to avoid tall, leggy seedlings is to keep your grow light close enough. Keep LED or CFL T5 strip lights 6–9 inches (~15–25 cm) away. As the seedlings grow taller, adjust the distance of the light accordingly.
#7: Optimal Temperature
Seedlings require light, water, and the correct temperature to thrive. I recommend keeping the temperature between 70–78°F (22–26°C) and ensuring the humidity is between 65–70%.
This will create a warm, humid environment that keeps transpiration levels low and prevents the soil from drying out too frequently. Use a digital hygrometer to see the exact temperature and humidity levels.
#8: Create Wind Currents
Creating an environment with light, water, and carbon dioxide-rich air is essential for growing cannabis seedlings. Fresh air and wind currents also play a major role in strengthening the seedling’s stem and keeping the air around cool.
An oscillating fan is the best way to provide a consistent amount of airflow around the cannabis seedlings without overwhelming them with too much wind. You only need to provide enough current that you can see the stems wobbling with a gentle swaying motion.
#9: Low Light Intensity
Cannabis seedlings do not need any nutrients during the first two weeks of their life cycle and the same rule applies to light intensity. CFL T5 strip lights and low-powered LED lights designed for cloning are excellent sources of light intensity for cannabis seedlings.
If you only have access to a 600–1000-watt HID light, then try to find a balance between light intensity and distance. Many ballasts and high-powered LED grow lights are custom-made with dimming capabilities. Reducing the power and intensity provides the optimal environment for the first two weeks of life.
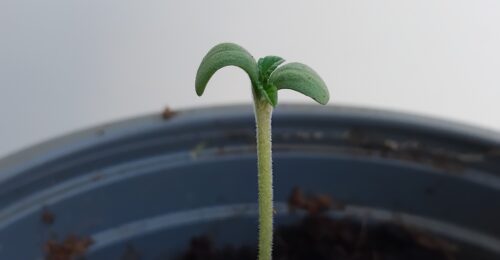
Photo by Stoney Tark
#10: Do Not Repot Autos
Auto-flowering cannabis plants are genetically wired to begin flowering four weeks from the day the seeds sprout. So on paper, autos spend two weeks in the seeding stage, a further two weeks in the vegetation stage, and then the flowering period begins regardless. An autoflower lifecycle is much shorter than a photoperiod’s.
The best advice I can give any grower who is using auto-flowering cannabis seeds is to plant in one large container and not repot. Autos do not respond well to repotting, and you risk stunting growth during a pivotal transition stage.
#11: Label Your Pots
This rule applies only if you are growing multiple cultivars at once. I am not the only one over the years who has gotten the cannabis seedlings mixed up. A simple and effective way to prevent this from ever happening is to use sticky labels and name and number the pots.
Use waterproof labels and write everything clearly. Do not get into the habit of writing initials and using small labels that can become difficult to read.
Take Your Indoor Garden Further
If you want structured guidance beyond trial and error, Oaksterdam’s Home Grow course walks you through setting up and running a productive indoor garden from seed to harvest. When you’re ready to turn that experience into job-ready skills, the Commercial Horticulture Worker program adds live instruction, hands-on learning, and the practical training you need to step into a professional grow with confidence.
Use code “tark10” at checkout to save 10% on your enrollment in either course.